
Photographing Children With Special Needs: A Complete Guide
Table of Contents
- Understanding Your Subject: Observation and Patience
- Sensory-Friendly Photography Tips for Comfortable Sessions
- How to Prepare for a Photoshoot With Special Needs
- Camera Settings and Technical Approach
- Tips for Photographing Non-Verbal Children
- Composition, Framing, and Visual Storytelling
- Post-Processing and Delivering Authentic Results
- Frequently Asked Questions
Last Updated: September 21, 2026
Understanding Your Subject: Observation and Patience
Photographing children special needs requires a fundamentally different approach than standard portrait work. The core skill isn’t technical, it’s the ability to watch, wait, and recognize authentic moments as they unfold naturally.
Before touching your camera, understand how the child communicates, what makes them comfortable, and what triggers anxiety. Some need 15 minutes to warm up, others an hour. That time is essential data.
Watch for moments when the child’s guard drops, engaged with a toy, lost in thought, or genuinely smiling. Those fleeting seconds are where authentic photographs live.
The best moments rarely happen on command. Position yourself to catch them. Use burst mode to capture sequences, not individual frames. You’ll find authentic expressions buried in those sequences, the ones that happened before the child realized they were being photographed.
Sensory-Friendly Photography Tips for Comfortable Sessions
Many children with special needs experience sensory sensitivities: bright lights, loud shutters, crowded rooms. Eliminate these stressors before they derail the session.
Use soft, natural light from windows instead of flash. If you need additional light, use diffused sources at a distance. Avoid overhead lighting that casts harsh shadows.
Mechanical shutters can startle children. Use silent or quiet shutter mode if available, or give the child advance warning before shooting.
Keep the session space calm and predictable:
- Limit the number of people present
- Use a consistent, quiet speaking voice
- Avoid sudden movements or gestures
- Offer a comfort item if the child has one
- Take frequent breaks
A sensory-friendly session is slower and quieter than you’re used to. That’s not a limitation, it’s what allows authentic moments to emerge. Children relax when they feel safe.
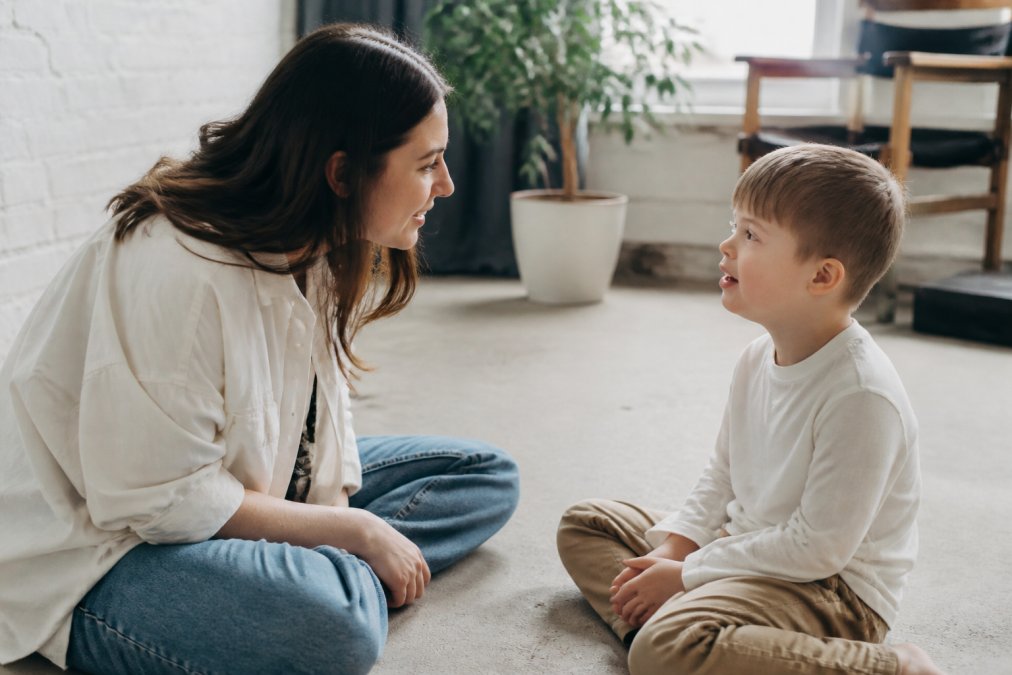
How to Prepare for a Photoshoot With Special Needs
Contact the family weeks in advance. Ask about the child’s needs, communication style, triggers, and comfort strategies.
Create a simple visual schedule showing what will happen: arriving, choosing location, taking photos, break, finishing. Visual schedules reduce anxiety by eliminating uncertainty.
Discuss logistics with the parents beforehand:
- What time of day is the child most alert and cooperative?
- Are there specific sensory sensitivities you need to know about?
- What clothing does the child prefer?
- Are there comfort items or routines that help?
- How long can the child realistically focus before needing a break?
Arrive early to scout the location, remove clutter, adjust lighting, and test camera settings. This preparation directly impacts session flow.
Preparation is where the real work happens. Shooting is execution of a carefully planned approach, allowing you to stay present and responsive instead of scrambling.
Camera Settings and Technical Approach
Your settings should support patience and responsiveness. Photographing children special needs requires flexibility to capture authentic moments in unpredictable situations.
Baseline Settings for Predictable Performance
Start with these foundational settings:
- Shutter speed: 1/500 or faster. Children move unpredictably with sudden gestures or stimming behaviors. Faster shutter speed freezes movement and ensures sharp frames.
- Aperture: f/2.8 to f/4 for environmental portraits, f/4 to f/5.6 for more depth of field. Avoid f/1.4 or f/1.8, shallow depth of field can miss the child’s eyes if they move.
- ISO: Auto ISO with a ceiling of 3200. Prioritize shutter speed and aperture; let ISO rise to maintain them. Grain is acceptable; motion blur is not.
- White balance: Custom or daylight preset, adjusted for your actual light source. Skin tones are critical in this work. If you’re unsure, shoot in auto white balance and correct in post-processing.
- Focus mode: Continuous autofocus (AF-C or AI Servo) with zone tracking. Single-shot autofocus fails with movement; continuous autofocus tracks the child as they shift.
- Focus area: Zone or expanded zone. Single-point focus is too rigid; zone focus tracks the child within a defined area.
Burst Mode and Sequence Shooting
Set burst mode to 5-10 fps. Collect sequences, not single shots. Authentic expressions often appear in frames 3-5 of a burst, after the child forgets the camera is there.
Burst mode captures fleeting moments of engagement. A 0.5-second smile is captured across 2-3 frames at 5 fps; you’ll miss it entirely at single-shot.
Addressing Sensory and Behavioral Challenges
Certain technical choices directly impact how the child experiences the session:
Camera shutter sound: Use silent or quiet shutter mode if available. If using a loud DSLR shutter, give advance warning and let the child hear the sound during setup so it’s not a surprise.
Flash and lighting: Avoid direct flash, it’s startling and triggers sensory responses. Use a reflector to bounce available light, or off-camera flash bounced off a ceiling. Soft, diffused light is always better.
Autofocus assist light: Disable it if possible, as it can startle children. Or position yourself so the light doesn’t shine directly at the child.
File Format and Dynamic Range
Shoot in raw format. Raw files give you dynamic range to recover detail in shadows and highlights without losing information, essential for preserving natural appearance while enhancing light mood.
Lens Selection
Use 70-135mm for portraits, flattering, non-distorting, and allows distance from the child. An 85mm or 100mm prime is ideal. Avoid ultra-wide lenses (24-35mm), which distort features and feel invasive.
Handling Unpredictable Movement
Children may move unpredictably with stimming or sudden shifts. Use continuous autofocus, faster shutter speeds, and burst mode. Leave extra space around the child in the frame and position yourself at an angle rather than directly in front.
Testing and Adjusting On-Site
Arrive early and test settings in the actual location. Confirm autofocus tracking, shutter speed, exposure, and white balance. Don’t assume settings from previous sessions, adjust for different light, child, and environment.
Avoid settings that sound good in theory but fail in practice: single-point autofocus (too rigid), slow shutter speeds (motion blur), direct flash (startling), or manual focus (you’ll miss moments while hunting focus). Prioritize settings that give you flexibility and speed.
Tips for Photographing Non-Verbal Children
Non-verbal children communicate through expression, body language, and behavioral patterns. Read these signals and respond with intentional, structured communication that doesn’t rely on spoken language.
Understanding Communication Modes
Non-verbal children may use AAC devices, sign language, PECS, pointing, vocalizations, or gesture (Augmentative and Alternative Communication (AAC)).
Behavioral Signals and What They Mean
Learn to read the full spectrum of behavioral cues:
- Engagement signals: Relaxed posture, soft eye contact or focused gaze on an object, natural hand movements, vocalizations that sound content, moving toward you or the camera, reaching for props or toys, mirroring your movements or expressions.
- Neutral/uncertain signals: Stillness, averted gaze, repetitive movements (stimming), looking to parent for reassurance, moving away slowly, reduced vocalizations.
- Distress signals: Stiffness or rigidity, covering ears or eyes, rapid or agitated movements, high-pitched or distressed vocalizations, moving away quickly, self-soothing behaviors that intensify, changes in breathing or facial tension.
Structured Communication Without Words
Use visual and tactile communication to set expectations:
- Visual schedules and timers: Show a simple visual sequence of what will happen. Use a visual timer so they see how much time remains before a break. Visual structure eliminates uncertainty.
- Modeling and demonstration: Show rather than explain. Point to where you want them to sit, then sit there. Make a silly face and wait for them to mirror it. Children learn through observation and imitation.
- Offering choices: Give two concrete choices rather than open-ended questions. “Sit here or stand here?” works better than “Where do you want to be?” Choices give agency and reduce overwhelm.
- Tactile and proximity communication: Some children respond to gentle touch (if parent approves). A light touch, high-five, or sitting close communicates encouragement. Others need distance. Always ask the parent about comfort with physical contact.
Working With the Parent as Your Communication Partner
Creating Opportunities for Authentic Moments
The best communication with non-verbal children is patient, visual, and respectful of their own communication style. You’re not trying to make them “normal” for the camera, you’re creating a safe space where they can be fully themselves, and capturing that authenticity.
Composition, Framing, and Visual Storytelling
Environmental portraiture works beautifully for children with special needs. Include context showing who they are, their favorite place, meaningful objects, or the person they’re most comfortable with.
Post-Processing and Delivering Authentic Results
Post-processing honors the authenticity you captured. The goal is to enhance what’s real, not perfect the child.
Frequently Asked Questions
How do you prepare a child with special needs for a photoshoot?
Start by meeting the child in a low-pressure environment before the shoot. Spend time understanding their communication style, sensory preferences, and comfort level. Share the studio space in advance if possible, or use video calls to familiarize them with your setup. Discuss with parents what triggers overstimulation and what calms the child. Arrive early, allow extra time for transitions, and keep the session shorter than typical shoots. Use clear, simple language and give advance notice before moving to new locations or changing lighting.
What sensory-friendly photography tips should I use during the session?
Control the environment carefully: dim harsh overhead lights, use soft, diffused natural light or gentle studio lighting, and minimize sudden sounds. Allow breaks between shots, offer a quiet space nearby, and let the child take the lead on pacing. Avoid strong perfumes or scents. Keep communication calm and predictable. If the child shows signs of sensory overload, pause immediately. Some children respond well to fidget tools or comfort items nearby. Always ask parents about specific sensory needs, what works for one child may overwhelm another.
How can you build rapport with non-verbal children during a photoshoot?
Non-verbal children communicate through body language, gestures, and expressions. Watch for signs of comfort or distress and respond immediately. Use facial expressions, gentle movements, and positive energy to create connection. Make eye contact when appropriate, smile authentically, and celebrate small moments with genuine enthusiasm. Work with parents as translators if needed. Offer choices through gestures or visual options rather than verbal questions. Allow the child to lead interactions and never force engagement. Sometimes the most authentic moments come when you step back and let the child be themselves.
What camera settings work best for capturing active or unpredictable children?
Use continuous autofocus (AF-C or AI Servo) to track movement in real time. Set a fast shutter speed (at least 1/250s, ideally 1/500s or faster) to freeze motion without blur. Use burst mode to capture multiple frames per second, increasing your odds of catching genuine expressions. Set ISO high enough to maintain shutter speed in softer lighting, don’t fear noise if it means capturing the moment. Use aperture between f/2.8 and f/5.6 to balance depth of field with shutter speed flexibility. Shoot in RAW format for maximum flexibility in post-processing.

Be the first to comment